General: Merchant Gateway Recurring Payments Instructions
1. Review Existing Recurring Payments
2.1 Setting up a Single Payment
2.1.2 Enter Payment Information
2.2 Setting up Recurring Payments
2.2.2 Enter Payment Information
3.1.2 Select Reschedule Payments
4.1.1 Begin at Reschedule Payments or Edit Payments screen
4.1.2 Enter Payment Information
5.2.1 Deleting a Single Payment
Recurring Payments
Set up new Recurring and One Time Payments and review existing Recurring Payments under this tab.

1. Review Existing Recurring Payments
Information regarding recurring payments or single payments that have a future date that have been set up in the system are displayed here and can be filtered by status, amount, customer id and name.

2. Setting up Payments
2.1 Setting up a Single Payment
2.1.1 Add New Payment
To set up a single payment, click “Add new payment.”

2.1.2 Enter Payment Information
On the following page enter the pertinent information. Items marked with a red asterisk are required. The right hand side of the page includes the particular details payment. As you make changes, the preview at the bottom changes in real time for verification purposes. The system defaults to 1 payment, ensure that this is not changed for a single payment. If the customer would like to set the payment up to take place in the future, simply choose the appropriate date. Note that no payments are run immediately. All payments out of Recurring Payments are processed at 7:30AM so setting the payment with today’s date is not possible and the system defaults to tomorrow’s date. ENSURE THAT THE “ACTIVE: YES” BOX IS CHECKED OR THE PAYMENT WILL NOT PROCESS.

2.1.3 Complete Payment Set Up
Once all information is correct, press the “Add Recurring Payment” button.

2.1.3 Confirmation Screen
You will be returned to the Recurring Payments home screen with a confirmation message. To set up additional payments simply follow the same steps -

2.2 Setting up Recurring Payments
2.2.1 Add New Payment
To set up recurring payments, click “Add new payment.”
2.2.2 Enter Payment Information
On the following page enter the pertinent information. Items marked with a red asterisk are required. The right hand side of the page includes the particular details payment. As you make changes, the preview at the changes in real time for verification purposes. The system defaults to 1 payment, ensure that you change this setting to the correct number of payments. The system also defaults to “Daily” as the Frequency. Ensure that the Frequency has been changed to match what the customer is requesting (weekly, monthly, etc.) If the customer would like to set the payment up to take place on a future date, simply choose the appropriate date. Note that no payments are run immediately. All payments out of Recurring Payments are processed at 7:30AM so setting the payment with today’s date is not possible and the system defaults to tomorrow’s date. Dates for later payments in the process will be calculated based on the first payment’s date. ENSURE THAT THE “ACTIVE: YES” BOX IS CHECKED OR THE PAYMENTS WILL NOT PROCESS.

2.2.3 Complete Payment Set Up
Once all information is correct, press the “Add Recurring Payment” button.
2.2.4 Confirmation Screen
You will be returned to the Recurring Payments home screen with a confirmation message. To set up additional payments simply follow the same steps -
3. Editing Recurring Payments
3.1.1 Getting Started
To edit a recurring payment, select the payment out of the list of ongoing recurring payments.

3.1.2 Select Reschedule Payments
Select the “Reschedule Payments” link on the right side of the screen -

3.1.3 Make Edits
Make any changes required on the next screen. Note that the system reverts to the defaults so ensure that all fields are correct with the changes being requested/made. The system will show the changes to the plan in real time. When the payment plan has been fully re-entered, press “Save Changed Schedule” -

3.2.1 Changing a Date
If you only need to change the date for one or more payments, select the Calendar icon to the change button.

3.2.2 Make Edit
The following calendar screen will pop up. Simply make the appropriate selection.

3.3 Important Reminder
Ensure you press the “Save Changes” button at the bottom of the screen after making any alterations to a plan or payment.

4. Add a Payment
It is possible to add a single payment to a set of recurring payments.
4.1.1 Begin at Reschedule Payments or Edit Payments screen
You can add a payment to any existing recurring payment plan. Click the “Add payment” button from either the reschedule payments screen or the edit payments screen -
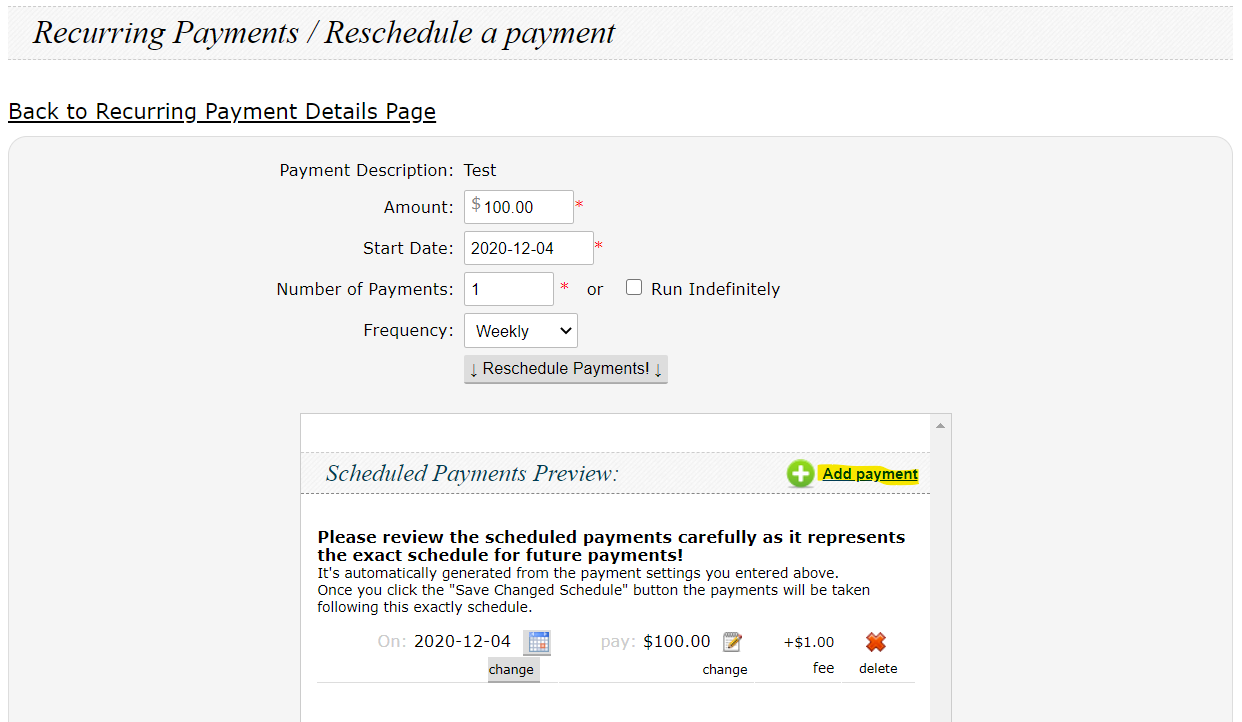

4.1.2 Enter Payment Information
The following screen will pop up. Enter the pertinent information. Note that there is no update to the system in real time with this option. Also note that this does not change any other payments. The system does not reschedule later payments -


4.2 Important Reminder
Ensure you press the “Save Changes” button at the bottom of the screen after making any alterations to a plan or payment.
5. Deleting payments
5.1.1 Getting Started
To delete a recurring payment, select the recurring payments out of the list of ongoing recurring payments.
5.2.1 Deleting a Single Payment
On the Edit Payments Screen simply select the “Delete” button for the payment in question.

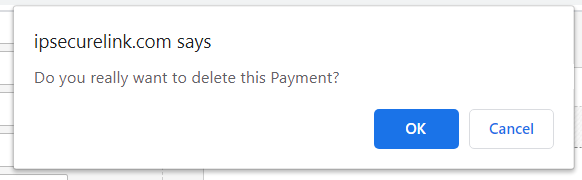
5.2.2 Confirmation Window
The following confirmation window will appear. Select “OK” to proceed.

5.2.3 Payment Deleted
On the below screen you will see that the payment in question has been deleted.

5.2.4 Important Reminder
Ensure you press the “Save Changes” button at the bottom of the screen after making any alterations to a plan or payment.
5.3.1 Deleting All Payments
On the Edit Payments screen select the Delete Button at the bottom of the screen.

5.3.2 Confirmation Window
The following confirmation window will appear. Select “OK” to proceed.
5.3.3 Delete Confirmed
The below confirmation screen will appear.

Related Articles
How to Add a New Payment Account in Intelligent Payments (Merchant Gateway)
Adding a new payment account in Intelligent Payments is quick and straightforward. Follow these steps to ensure your payment details are up to date: Adding a New Payment Account: Navigate to My Payment Accounts: Log into your account. Click on the My ...Adding Custom Fields to Merchant Gateway Terminal
The way your Merchant Gateway Virtual Terminal looks can vary depending on you level of service. However, most Intelligent Contacts Merchant Gateway Virtual Terminals will look similar to the following: To add custom fields do the following: 1. Login ...How to add automated transaction reports in Merchant Gateway
How to add automated transaction reports in Merchant Gateway The Intelligent Contacts Merchant Gateway has an “on demand” transaction log that allows a user, depending on that user’s access level, to view transactions and transaction history for any ...Merchant Gateway Training: Episode 1
How to Change Merchant Gateway Password
Change Password Under the "My Profile" menu category, you can change your password when required/desired. As with other change password functions, New and Confirm passwords must match.