IM SMS Training
Intelligent Messaging SMS
5.2 Define High Level Information
1.0 Setting Up New Users
Intelligent Contacts will be glad to set up new users for you. Simply provide us each users name, e-mail address and password (or leave this blank and we’ll set up a password which can be reset.) There is only 1 level of user access in our SMS messaging system so there is no need to define user level.
2.0 Logging In
To log in simply go to im.intelligentcontacts.com and enter your e-mail address and password. If you have not set a password yet, click “Forgot Password” and a link that will allow you to set your password will be sent to you.

3.0 Contact Lists
The first step in sending out text blasts is creating a contact list.
3.1 Contact Lists
To begin go to Contact Lists under the Campaigns tab to create your message and select “Add New List.”

3.2 Upload Contact List
Name your contact list and press “Choose File.” You will be able to browse your computer find the file. The only limitation on this file is that it must have a cellphone number included. Any other information/headers are optional. The file must be in .CSV format. After the correct file is chosen, press “Submit.”3.

3.3 Contact List Wizard
You will automatically be taken to the Contact List Wizard. This will allow you to line up the information from your file with the headers from our system. Each header will be pulled in and you can flag it as a “Phone number” which will receive texts and is required, “Email address” which is not used in this capacity, or a “Unique Identification field” which is any information you would like to include for tracking purposes or in your messages. Once each header has a category click “Save & Finish.”

4.0 Text Message Templates
The Message going out to your clients is created in Templates
4.1 Text Messages Templates
To begin, go to Text Messages Templates under the Campaigns tab to create your message and select “Add New Template.”

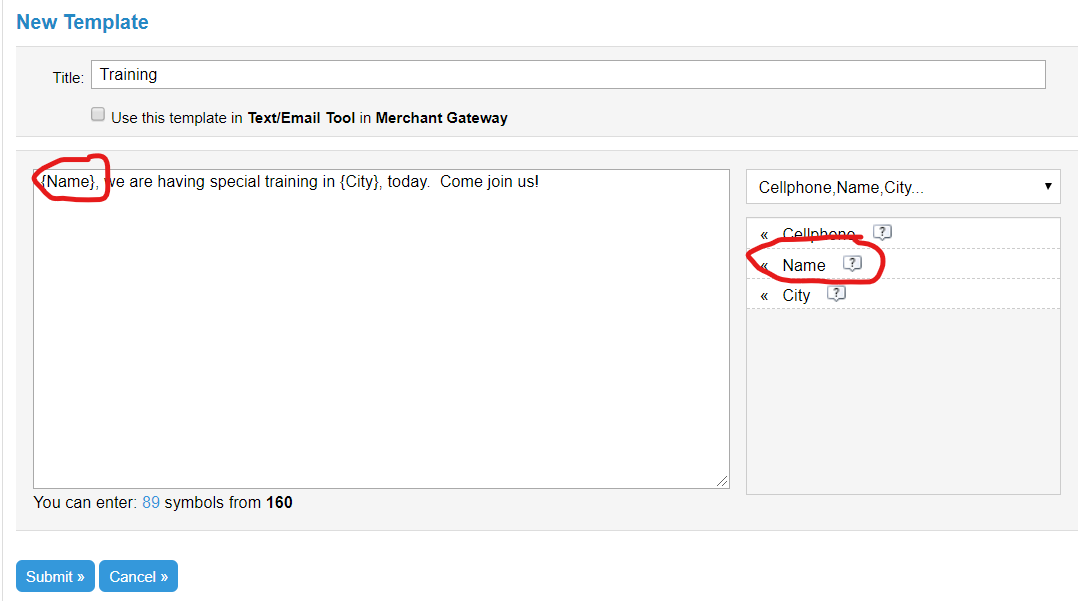
4.2 Text Message Details
Provide a title for your message, this will be for internal usage and recipients will not see this title. Type your message into the given space. If you have already uploaded a contact list with headers, you can map these headers into your message simply by selecting them in the drop down menu on the right side.

4.3 Message
Simply type in the message you want to send. You can use the information from your contact list dynamically by clicking on the label on the right at the point you want it inserted into your message. Once you have completed your message, press “Submit.”
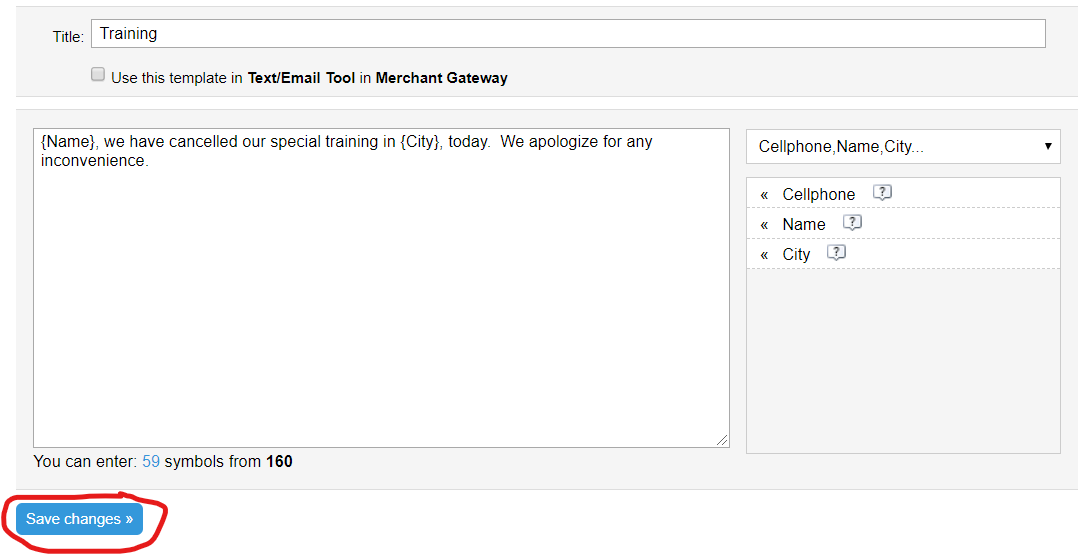
4.4 Editing
To edit a message, go to your “Text Message Templates” and select the Template in question.

4.4.1 Change Text
Change the text as desired and press “save changes.”
5.0 Campaigns
The final step is combining your contact list and message into a Campaign.
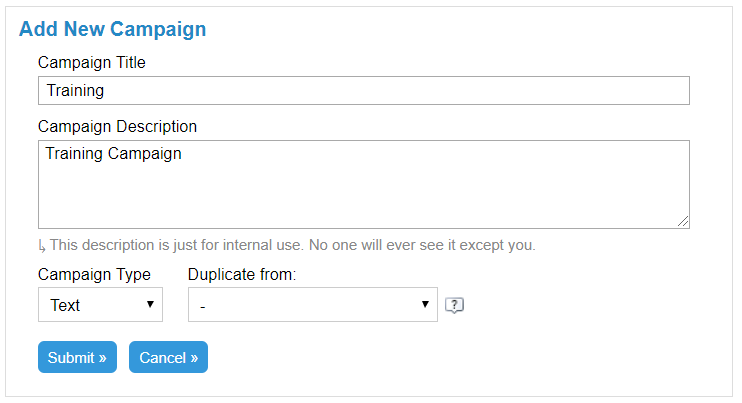
5.1 Creating a Campaign
Under campaigns, select “Add new Campaign.”

5.2 Define High Level Information
Provide a title and description for internal tracking. You can duplicate an existing campaign if one has been created previously. Click “Submit.”
5.3 Campaign Settings
There are several settings within the campaign, including start date/time, who to send messages to, who not to send messages to and what to send.
5.3.1 General
The General screen includes the Campaign Title and Description as well as the date and time you want the campaign to begin.

5.3.2 Who to send to
Select the Contact List that you want to send the messages to and select the number type to be sent to.

5.3.3 Who not to send to
If you have one or more do not contact lists or have multiple contact lists that might have overlap in contacts, they can be uploaded as a contact list and selected here.

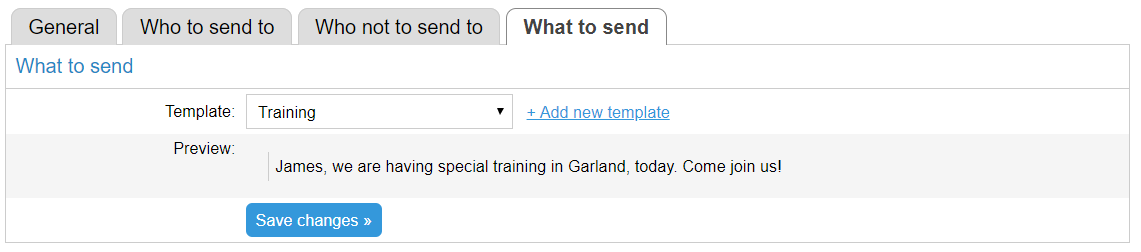
5.3.4 What to send
Select a template and a preview of the message will come up. You can also select “Add new template” which will take you to that screen (see 4.0)
5.3.5 Warnings
Throughout the process, the system will tell you any required items that are missing.

Related Articles
Administrator Training: Site Text Cheat Sheet
Purpose: This article will show you where to find different site elements which can be edited via the site text menu in your Intelligent Portal. Page Guide 5 Account Lookup Screen 6 Account Lookup Screen (Error) 7 Confirmation Screen 8 Confirmation ...Help: Training Videos
Access Call Center and log in as an admin. ...Create a Texting/SMS Campaign
Create a Basic Campaign Template Provided your account has access to the following modules, you can create SMS, Email or Voice campaign templates. The guide below will show you how to create an outgoing SMS Campaign Template. Create SMS Campaign ...Opt-Out Responses in Texting
Below is a list of responses that will opt a consumer out of messaging in our texting tool - Stop Messages: (RE)Stop (Re: )Stop (stop) arret can I please unsubscribe can you please delete me can you please not text me can you please remove me can you ...Create a Texting/SMS Campaign with Responses or Data Capture
Create SMS Campaign Select Tools on the left navigation menu. Select Campaigns from the drop down. Click + Create Basic Campaign button in the upper right of the screen. Select SMS Fill in the name of the campaign (this is for internal use only) ...